Deploying our first component
The sample application is composed of a set of Kubernetes manifests organized in a way that can be easily applied with Kustomize. Kustomize is an open-source tool also provided as a native feature of the kubectl CLI. This workshop uses Kustomize to apply changes to Kubernetes manifests, making it easier to understand changes to manifest files without needing to manually edit YAML. As we work through the various modules of this workshop, we'll incrementally apply overlays and patches with Kustomize.
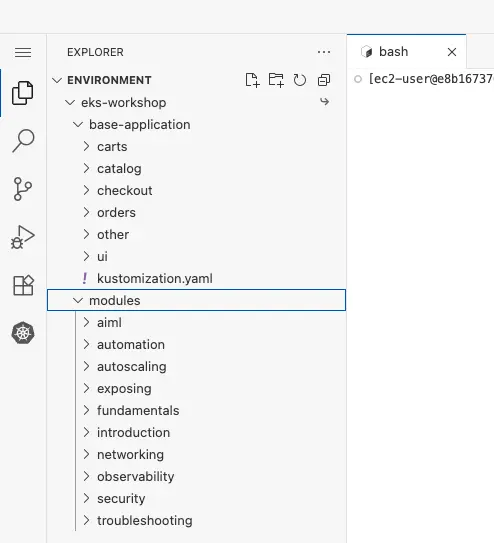
The easiest way to browse the YAML manifests for the sample application and the modules in this workshop is using the file browser in the IDE:

Expanding the eks-workshop and then base-application items will allow you to browse the manifests that make up the initial state of the sample application:

The structure consists of a directory for each application component that was outlined in the Sample application section.
The modules directory contains sets of manifests that we will apply to the cluster throughout the subsequent lab exercises:
Before we do anything lets inspect the current Namespaces in our EKS cluster:
NAME STATUS AGE
default Active 1h
kube-node-lease Active 1h
kube-public Active 1h
kube-system Active 1h
All of the entries listed are Namespaces for system components that were pre-installed for us. We'll ignore these by using Kubernetes labels to filter the Namespaces down to only those we've created:
No resources found
The first thing we'll do is deploy the catalog component by itself. The manifests for this component can be found in ~/environment/eks-workshop/base-application/catalog.
configMap.yaml
deployment.yaml
kustomization.yaml
namespace.yaml
secrets.yaml
service-mysql.yaml
service.yaml
serviceAccount.yaml
statefulset-mysql.yaml
These manifests include the Deployment for the catalog API which expresses the desired state of the catalog API component:
apiVersion: apps/v1
kind: Deployment
metadata:
  name: catalog
  labels:
    app.kubernetes.io/created-by: eks-workshop
    app.kubernetes.io/type: app
spec:
  replicas: 1
  selector:
    matchLabels:
      app.kubernetes.io/name: catalog
      app.kubernetes.io/instance: catalog
      app.kubernetes.io/component: service
  template:
    metadata:
      annotations:
        prometheus.io/path: /metrics
        prometheus.io/port: "8080"
        prometheus.io/scrape: "true"
      labels:
        app.kubernetes.io/name: catalog
        app.kubernetes.io/instance: catalog
        app.kubernetes.io/component: service
        app.kubernetes.io/created-by: eks-workshop
    spec:
      serviceAccountName: catalog
      securityContext:
        fsGroup: 1000
      containers:
        - name: catalog
          envFrom:
            - configMapRef:
                name: catalog
            - secretRef:
                name: catalog-db
          securityContext:
            capabilities:
              drop:
                - ALL
            readOnlyRootFilesystem: true
            runAsNonRoot: true
            runAsUser: 1000
          image: "public.ecr.aws/aws-containers/retail-store-sample-catalog:1.2.1"
          imagePullPolicy: IfNotPresent
          ports:
            - name: http
              containerPort: 8080
              protocol: TCP
          livenessProbe:
            httpGet:
              path: /health
              port: 8080
            initialDelaySeconds: 30
            periodSeconds: 3
          readinessProbe:
            httpGet:
              path: /health
              port: 8080
            successThreshold: 3
            periodSeconds: 5
          resources:
            limits:
              memory: 512Mi
            requests:
              cpu: 250m
              memory: 512Mi
          volumeMounts:
            - mountPath: /tmp
              name: tmp-volume
      volumes:
        - name: tmp-volume
          emptyDir:
            medium: Memory
Run a single replica
Apply labels to the Pods so other resources can refer to them
Use the public.ecr.aws/aws-containers/retail-store-sample-catalog container image
Expose the container on port 8080 named http
Run probes/healthchecks against the /health path
Requests a specific amount of CPU and memory so the Kubernetes scheduler can place it on a node with enough available resources
The manifests also include the Service used by other components to access the catalog API:
apiVersion: v1
kind: Service
metadata:
  name: catalog
  labels:
    app.kubernetes.io/created-by: eks-workshop
spec:
  type: ClusterIP
  ports:
    - port: 80
      targetPort: http
      protocol: TCP
      name: http
  selector:
    app.kubernetes.io/name: catalog
    app.kubernetes.io/instance: catalog
    app.kubernetes.io/component: service
Exposes itself on port 80 and targets the http port exposed by the Deployment, which translates to port 8080
Selects catalog Pods using labels that match what we expressed in the Deployment above
Let's create the catalog component:
namespace/catalog created
serviceaccount/catalog created
configmap/catalog created
secret/catalog-db created
service/catalog created
service/catalog-mysql created
deployment.apps/catalog created
statefulset.apps/catalog-mysql created
Now we'll see a new Namespace:
NAME STATUS AGE
catalog Active 15s
We can take a look at the Pods running in this namespace:
NAME READY STATUS RESTARTS AGE
catalog-846479dcdd-fznf5 1/1 Running 2 (43s ago) 46s
catalog-mysql-0 1/1 Running 0 46s
Notice we have a Pod for our catalog API and another for the MySQL database. If the catalog Pod is showing a status of CrashLoopBackOff, it needs to be able to connect to the catalog-mysql Pod before it will start. Kubernetes will keep restarting it until this is the case. In that case, we can use kubectl wait to monitor specific Pods until they are in a Ready state:
Now that the Pods are running we can check their logs, for example the catalog API:
You can "follow" the kubectl logs output by using the '-f' option with the command. (Use CTRL-C to stop following the output)
Kubernetes also allows us to easily scale the number of catalog Pods horizontally:
deployment.apps/catalog scaled
The manifests we applied also create a Service for each of our application and MySQL Pods that can be used by other components in the cluster to connect:
NAME TYPE CLUSTER-IP EXTERNAL-IP PORT(S) AGE
catalog ClusterIP 172.20.83.84 <none> 80/TCP 2m48s
catalog-mysql ClusterIP 172.20.181.252 <none> 3306/TCP 2m48s
These Services are internal to the cluster, so we cannot access them from the Internet or even the VPC. However, we can use exec to access an existing Pod in the EKS cluster to check the catalog API is working:
You should receive back a JSON payload with product information. Congratulations, you've just deployed your first microservice to Kubernetes with EKS!